Wednesday, June 24, 2026

You're So Tweet Friend!

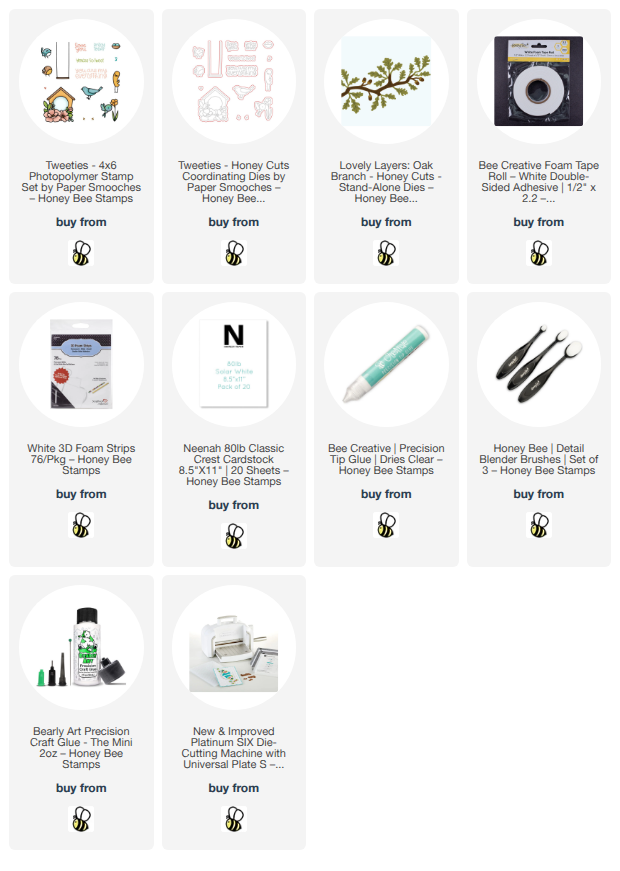
Happy Wednesday, friends!!  Today I'm sharing this sweet card that features Honey Bee Stamps adorable Tweeties stamp set and coordinating Tweeties dies.  I've nestled the bird house in this set into branches from the Lovely Layers: Oak Branch dies.  Read on for the details!

First I stamped the images from the Tweeties stamp set onto white cardstock with Intense black ink, an alcohol marker safe ink.  After I colored them with my Copic markers I cut them out with the coordinating Tweeties dies.

I used a white gel pen to add a few white highlights to the birds and birdhouse.

Next I die cut white cardstock with the dies in the Lovely Layers: Oak Branch set.  I cut each piece twice.  Then I colored them with some Copic markers.  I used Bee Creative Glue to adhere the layers together.

Before I adhered the images to my A2 card base I used a couple of blending brushes to add blue ink to the card.  I like to leave some open white spaces when I do this so it will have the appearance of light clouds in the sky.  I added just a bit of green ink to the bottom of the card.  There was enough green ink on my blending brush that I didn't even need to pull out an ink pad!

I used foam tape and glue to adhere all of the images to the card.  I did not add glue to the leaves of the Oak Branch with the bird house.  I like the easy dimension you get by not gluing everything down!

I stamped the sentiment from the Tweeties stamp set with black pigment ink.  After I cut it out with the coordinating die, I popped it up with a foam strip.

This card is so adorable and totally perfect to let someone know how sweet you think they are!  Bonus:  it was super easy to make!!

I sure do appreciate you stopping by!  I hope you have a wonderful and crafty day!

Thank you so much for using my affiliate links to shop (never any additional cost to you)!

Friday, June 19, 2026

You're Always In Style -- Alex Syberia Designs

Hey, friends!  Did you hear??  Earlier this month the announcement was made that I'm now on the amazing Alex Syberia Designs design team!  I'm so thrilled!  She is an individual owner of this company and has the most gorgeous designs!  Please check out her fabulous designs here.

I'll be sharing reels over on my Instagram a few times a month, and when I can, I'll have a corresponding blog post, like today!

This sweet card features these awesome products:

I used Distress Oxide inks with the Chic Bows stencils and blending brushes to create a pretty pink ombre effect.

After I trimmed the panel to 4" x 5-¼" I glued it to an A2 card base.

Next I used some opaque black foil and the Fancy Shoes Press Plates.  These can be used with both the BetterPress Letterpress System and the Glimmer Hot Foil System (or other similar foiling machines).

I added pretty stripes and dark pink color to the shoes' insides with two Copic markers.  Then I cut them out with the included dies.

The cute bows are from the Chic Shoes Die Set.  I blended Picked Raspberry and Spun Sugar Distress Oxide inks onto the pieces and then glued the layers together.

The shoes are adhered to a die cut vellum Nested Scallop Frames piece with thin foam squares.  I added more thin foam squares onto the vellum, behind the shoes to adhere the piece to the card.

I hot foiled the sentiments from the Shoes Sentiments Press Plate & Die Set, cut them out with the coordinating dies, and then popped the sentiments up with foam adhesive.

Thanks so much for stopping by today!  I hope you have a fabulous weekend and lots of crafty time too!

Thank you for using my affiliate links to shop (never any additional cost to you)!

Wednesday, June 17, 2026

Let's Make A Vintage Bug Car Card With A Stenciled Lakeside Scene

Hello crafty friends!  Today I'm sharing this fun masculine card that features Honey Bee Stamps Lovely Layers: Vintage Bug Honey Cuts.  I haven't had a chance to play with this fun little set and it makes a fantastic card for a guy!  Fun fact:  my very first car was a VW Beetle that was a pale yellow, had a stick shift, crank windows, and no AC!!  In Texas!!!  Good thing I was super young to be able to handle that heat!  Hahaha!

I've paired the Lovely Layers: Vintage Bug with a favorite older Lakeside Scene Builder die and the coordinating At The Lake stencil set.

I planned on this being a 5" x 7" card and placed the Lakeside Scene Builder die onto my card 5" x 7" white cardstock panel to create space for the Vintage Bug below the lake.

To color the lake scene, I used various inks (in the list below) in my stash to color through each of the six At The Lake Stencils using ink blending brushes.  Note: I stenciled the sky directly onto and, at the top of, my A7 card base.

I die cut the canoe and oar (in the Lakeside Scene Builder set) from white cardstock and colored the pieces with Copic markers.

Then I used glue to adhere the die cut and stenciled piece to my card.

Next I die cut blue, black, white, and silver cardstocks with the dies from the Lovely Layers: Vintage Bug set.  The base layer of the Bug is cut from white cardstock and this allowed me to use a blue Copic marker to add color for the windows.  After adding a bit of blue ink shading with a blender brush, I used glue to assemble the Bug.

The sentiments are from the Hooked On You stamp set.  I stamped them with black pigment ink and cut them out with the coordinating dies.  Some foam adhesive strips pops them up on the card.

I totally love this lake scene with the Lakeside Scene Builder and the At The Lake Stencils!  The Vintage Bug fits right in, I think!  Change up the sentiments for lots of other occasions for the guys!

Thanks so much for stopping by today!  I hope it's a good and crafty day for you!

Thank you so very much for using my affiliate links to shop (never any additional cost to you)! 

Thursday, June 11, 2026

Way To Gator Done!! -- Simon Says Stamp

Hello friends!  Today I'm sharing another card I made using products from Simon Says Stamps' Always There release!  This one, that's so sweet and easy to make, features the super cute Mr. Snappy stamp set (that name! love it!) and the Star Champion embossing folder.

There are three adorable gator images in the Mr. Snappy stamp set.  One that grills, another builds, and the one I chose, the happy one!  I stamped the gator, and the balloon, in alcohol marker safe black ink and colored both with my Copics.

There are coordinating Mr. Snappy dies available, but I don't have them so I easily used my scissors to cut them out.  Then I added foam tape on the back of both pieces.

I stamped the sentiments, two of the eight included in the set, with black pigment ink.  I used my paper trimmer to cut them into rectangles and added foam tape to the back.

For my A2 card, I added a white cardstock layer that I embossed with the Star Champion embossing folder.  This folder would be so fabulous for many occasions such as graduation, birthdays, anniversaries, and lots more!!

After I glued the embossed panel to my card base, I removed the backing from the foam tape on the Mr. Snappy images and adhered them to the card.

After adding a couple of white gel pen lines to the balloon, I was finished!

Now you see how quick and easy this card was with Mr. Snappy!  Perfect for many celebrations!  Thanks so much for stopping by today.  Happy crafting!!

Thank you for using these affiliate links to shop (never any additional cost to you)!

Wednesday, June 10, 2026

Perfect Peonies Thinking Of You Card

Hello crafty friends!!  Today I am sharing this Copic marker colored card that features Honey Bee Stamps absolutely gorgeous Perfect Peonies stamp set and coordinating Perfect Peonies Honey Cuts.  It's been a while since I colored an image and I really enjoyed taking my time with this and just enjoying the process!

First I stamped this image from the Perfect Peonies stamp set with Bee Creative Intense Black ink which is safe to use with alcohol markers.  I used a BV31 Copic marker to "under-paint" the shadow areas of the petals where my darkest marker would be.  I finished the coloring with just a touch of Y11 over the lightest marker shade.  These are the colors I used for the flowers, buds, and leaves (I always color dark to light and have listed the markers in the order used):

  • flower and buds:  BV31, R14, R22, R43, R32, R11, Y11
  • leaves: G29, YG67, YG17, YG25, YG03

With my coloring complete, I cut the images out with the coordinating Perfect Peonies dies.

Next I die cut some vellum three times with the leaf stem from the Lovely Layers: Spring Greenery dies.  I used YG17 and YG25 to color the back of the vellum.

For the layers on the A2 card base I first die cut paper from the Garden Party paper pad with the largest die in the Antique Layering Frames set.  I lightly inked the edges with a coordinating beige ink with a blending brush.  I used Bee Creative glue to adhere the piece to the card base.

The smaller layer is die cut with the oval die in the Antique Layering Frames set and paper from the Hive Hues Garden Party cardstock pack.  I also lightly inked these edges with a coordinating ink.  I added foam tape to the back of the piece to adhere it to the card.

I decided on an arrangement for the Perfect Peonies image and the vellum leaves.  First I glued the leaves to the card and adhered the peony image with foam tape.

The sentiment is one of several in the Perfect Peonies stamp set.  After I stamped with black pigment ink, I cut it out with the coordinating die and adhered it with foam tape.

I think this sentiment is perfect for the tone and "feel" of this card!  Do you enjoy coloring?  I really hope I've given you some inspiration today to sit down, relax, and enjoy a good coloring session!  Have a wonderful day, and I'll see you back here next week!!

Thank you so much for using my affiliate links to shop (never any additional cost to you)!

Sunday, June 7, 2026

Hula-ing Over To Say Hello. -- Spellbinders

I'm back today with another card, this time featuring three of Spellbinders June Club Kits!  This card features an exclusive die set, Aloha Hula, that's only available with the subscription to the All-Clubs Crate Membership!  This membership has an approximate $315 value.  From the Spellbinders' website:

All-Clubs Crate Members will now receive:

    • 15% off select Spellbinders products, everyday  
    • 1 (one) Free Shipping Coupon to use every month. 
    • Glimmer & BetterPress have been combined into one Press & Foil Plate, and you'll still receive a roll of foil (or similarly valued complementary product)
    • Additional Crate Exclusive die or Press & Foil Plate that will only available during the monthly club window. 
    • 10 - 8.5 x 11 sheets of ColorWheel Cardstock that coordinates

Now, on to my card details!

The blue sky background is created with Breeze cardstock embossed with the awesome June 3D Embossing Folder, Island Style.  The tropical look of this fabulous embossing folder will be good for lots of summer/vacation type cards!  Next I hand cut the grassy layer from Rainforest cardstock and glued it to the embossed layer.

I cut various colored cardstocks with the dies from the Aloha Hula set (All-Clubs Exclusive).  I didn't even add any shading at all! (Not often that happens! Haha!). I did color the torch flame with my Copic markers though.  (The available cardstocks I used are in the list below.)

I love the Fawn cardstock color to give this hula dancer the perfect tan!  Oh, another spot of Copic marker is on the flower centers of the leis around her neck and waist.

The sentiment is another one included in the June Clear Stamp + Die set, This Way To Rainbows.  After I stamped it in black ink, I cut it out with the coordinating die.

This Aloha Hula girl is so cute and it would be super fun to make this an interactive type card by putting her grass skirt on a swinging element!

Thanks so much for stopping by today!  I hope you have lots of crafty time planned!

Thank you for using my affiliate links to shop (never any additional cost to you)!

Saturday, June 6, 2026

Sending You A Splash Of Happy

Today is the day that the June Club Kits by Spellbinders is open for sign ups!  My card to day features the adorable Small Die of the Month, Mahalo Sea Turtle.  The sentiment is one from the Clear Stamp + Die called This Way To Rainbows!

This card was so fun and easy to make!  I die cut the turtle from the Mahalo Sea Turtle set from white cardstock and colored it with my Copic markers.

I had thought about making a shaker card, but I wanted to get this card finished before I left on a short trip.  So I used two colored cardstocks, Seaside and Waterfall, for this card.

To give the card a similar look to a shaker card, I glued iridescent sequins to the card to imitate bubbles.

The This Way To Rainbows (Clear Stamp + Die) has 17 sentiments with included dies in the set!  There is also a pole sign with different shaped sign dies and a small die for a mound of sand included.  Click the link to see the set.

I stamped the sentiment in black ink, die cut it, and popped it up with foam squares.

The This Way To Rainbows stamp set can be used with all of the Club Kits and with lots of products you already have!  I love the adorable turtle in the Small Die Club Kit too!

Thanks for stopping by today!  I hope you have a great weekend with lots of crafting time!

Thank you so much for using my affiliate links to shop (never any additional cost to you)!